Create Curved Walls & Facades
with Weathergroove & Selflok
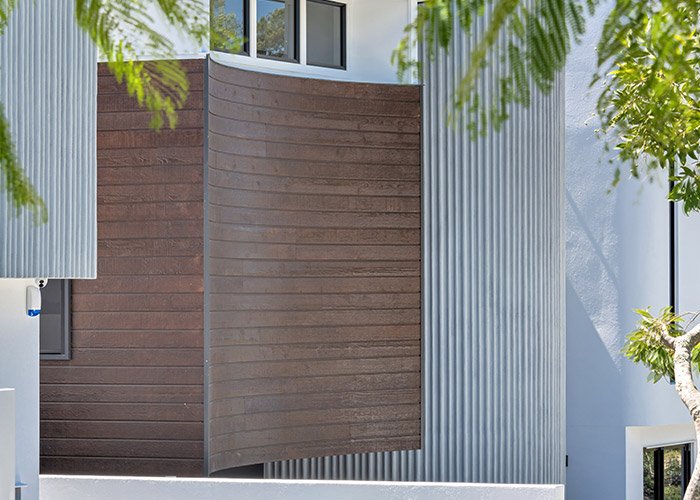
As specifiers explore the possibilities of curved designs, the role of materials in bringing these visions to life cannot be underestimated. Weathertex Weathergroove and Selflok offer a solution that seamlessly aligns with the curved revolution. Crafted from 100% natural materials, Weathertex cladding provides the perfect canvas for curved designs. Its flexibility and versatility are assets that specifiers and builders can leverage to create stunning curved facades and structures.
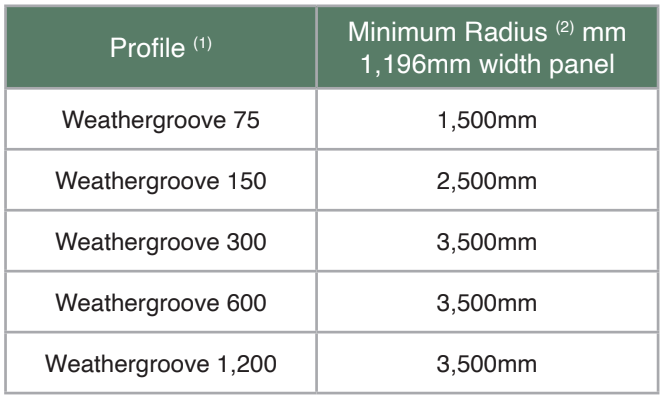
WEATHERGROOVE
NOTES:
1. All surface finishes can be used: Smooth, Woodsman, Ruff-Sawn & Natural.
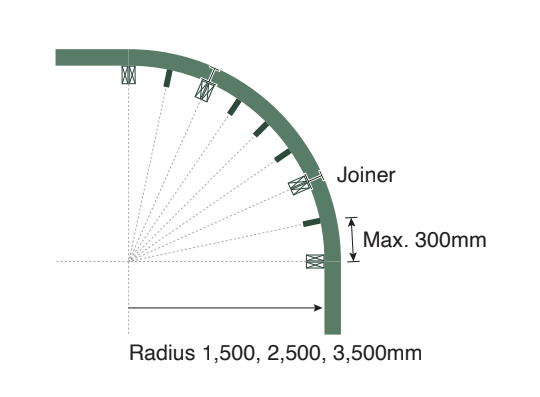
2. Radius to internal surface of the Weathertex panel, across width of panel.
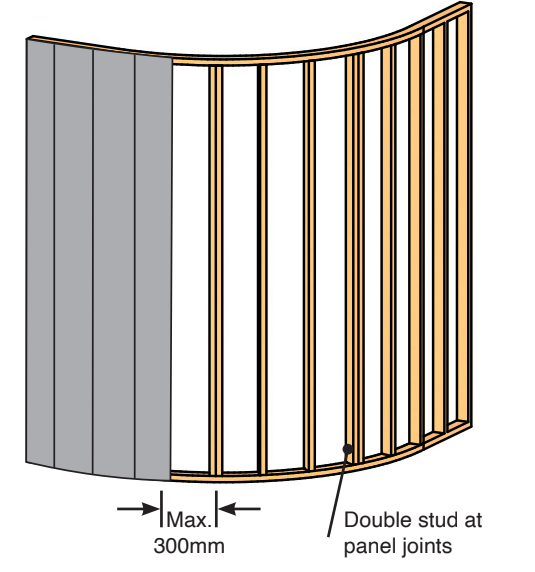
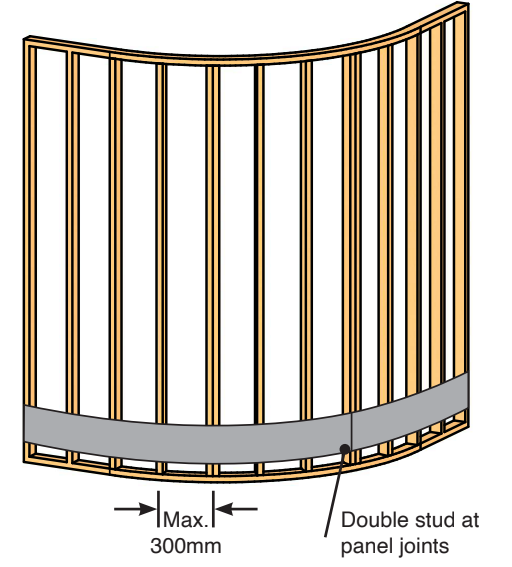
3. Space stud at a maximum 300mm centres, around curve, for all models, surface finishes & wall radii.
4. Double stud at the vertical edge when joining panels.
5. Refer to Installation Manual for additional information and instructions.
WEATHERGROOVE CURVED WALL INSTALLATION METHOD:
1. Smooth surface; use a Countersink drill bit (Smart-Bit or equivalent) to pre-drill and countersink each fastener location. Ensure fasteners are fixed 2mm below the surface before filling. Space fasteners 150mm along edges and 300mm through body of panel.
2. Use a Buildex Treated Pine 10g 8x50mm Countersink Rib Head screw (X503298) or equivalent for MPG10 timber framing studs.
3. Commence fixing either at vertical edge or at the centre line of panel.
4. Progressively fix at each stud to complete the curve.
5. To connect panels use a Weathergroove Joiner; available sizes; 2,745mm (146840), 3,050mm (146845), 3,660mm (146850)
6. Slide the Weathergroove Joiner onto the rebated vertical joining edge and fasten off through the exposed back flange of the joiner with a flat head nail or screw.
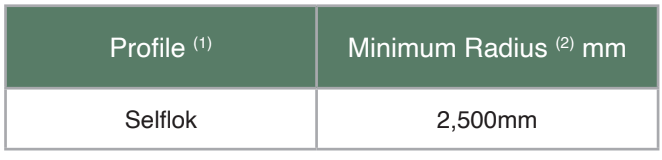
Selflok
SELFLOK CURVED WALL INSTALLATION METHOD:
1. Smooth surface; use a Countersink drill bit (Smart-Bit or equivalent) to pre-drill and countersink each fastener location. Ensure fasteners are fixed 2mm below the surface before filling. Space fasteners 150mm along edges and 300mm through body of panel.
2. Use a Buildex Treated Pine 10g 8x50mm Countersink Rib Head screw (part: X503298) or equivalent for MPG10 timber framing studs.
3. Commence at the bottom by fixing either at one side or at the centre line of the board.
4. Progressively fix at each stud to complete the curve.
5. Progressively add additional boards by securely engaging the next board.
6. To connect boards use a Long Vertical Joiner (on stud) (150600).
NOTE: Decorative Screws (finished flush / no pre-drill) may be used. Use AnchorMark S2 Cladding screw SS-TTT (6636802) to substitute the above.
Last Updated” 7th February 2026
Subscribe
Sign up for exclusive Weathertex tips and trends sent straight to your inbox