How to Install a Weathergroove Natural Butt Join on Studs
A neat Weathergroove Natural butt join starts behind the panels. The framing, flashing and single part polyurethane sealant all need to be in place before the second sheet is fixed. The 2 mm spacing at the join then helps recreate the groove in the panel profile.
Tools and materials
Weathergroove Natural panels
a caulking gun with single part polyurethane sealant
2 mm packers
A saw, tape measure and level
A nail gun and suitable brad nails
Appropriate PPE, including a dust mask when cutting
Check the wall before fitting the panels
Allow100 mm clearance from sealed ground and make sure the wall has vapour-permeable sarking. Stud centres must be no more than 600 mm apart. Check the Weathergroove installation manual for the required nogging arrangement.
Provide double studs at every join, with a damp-proof course or flashing behind each joint. The specified flashing differs by location: the installation detail identifies UV resistant aluminium or galvanised steel back flashing for New Zealand and Alcor bitumen-coated aluminium flashing for Australia. Use the current Weathertex installation manual to confirm the requirements for your project.
Seal both sheet edges
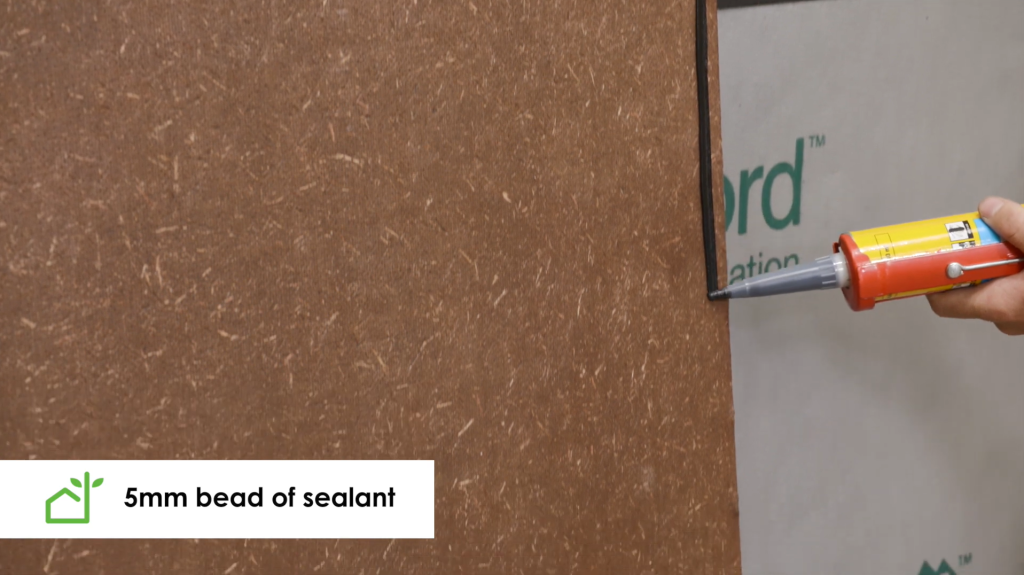
Run a 5 mm bead of single part polyurethane sealant down the edge of each sheet. This forms a secondary water barrier. Keep the sealant on the two edges rather than filling the middle of the joint.
Set the gap and fix the sheets
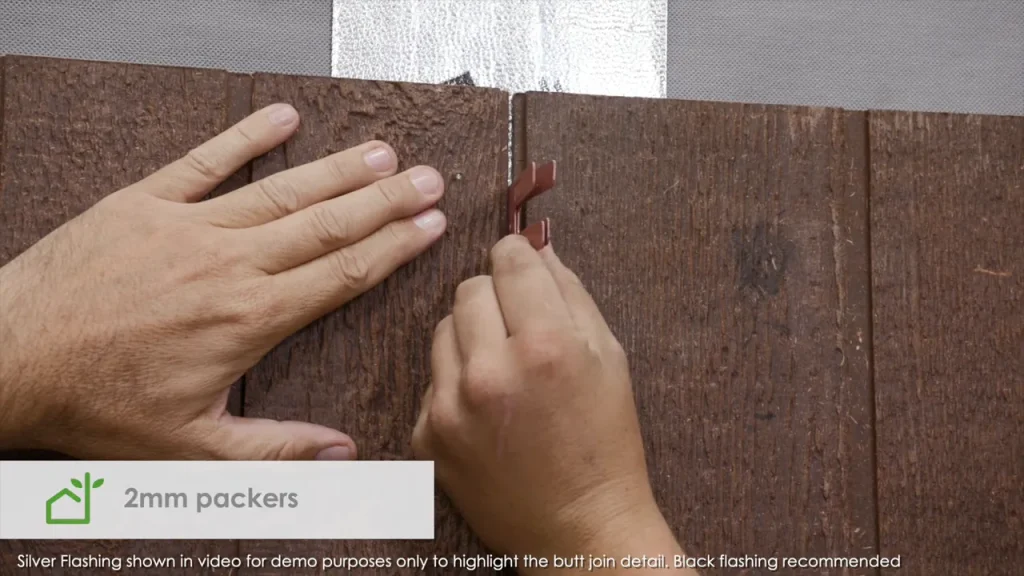
Now that we have single part polyurethane sealant on both sides of the joint, ensuring there’s none down in the middle, place 2 mm packers in the joint, ensuring that no then push the adjoining board into position. The packers establish the gap needed to recreate the appearance of a groove between the sheets. Once the gap is consistent, fix off the panels.
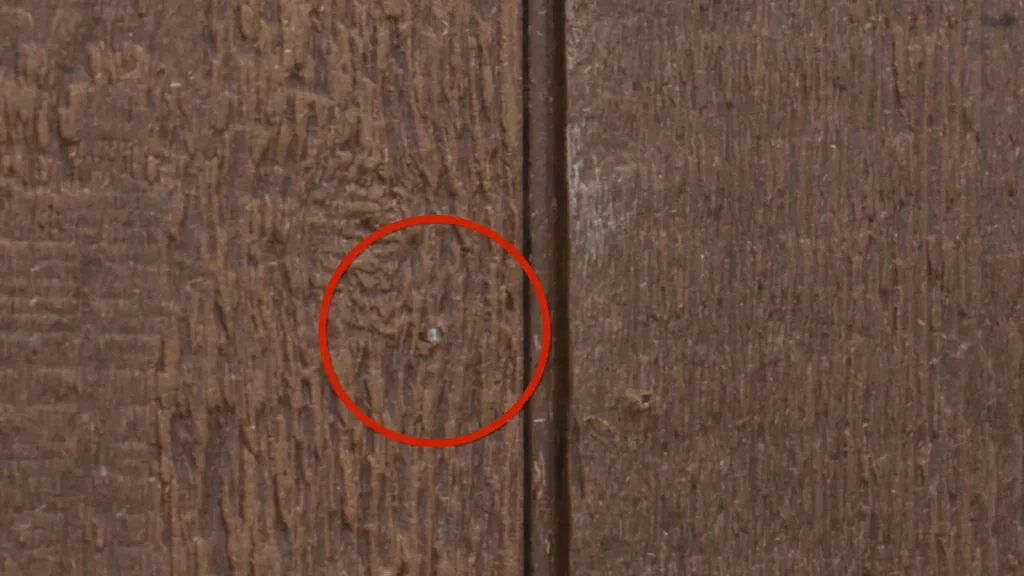
Weathertex recommends Paslode ND stainless steel brad nails for a discreet finish: the fixings are difficult to see within the panel profile. Before fastening, check the Weathergroove installation manual for the applicable wind tables and fixing details.
The finished join depends on getting each layer right: supported sheet edges, flashing behind the joint, single part polyurethane sealant on both edges, a measured gap and fixings suited to the installation conditions.
Newsletter
Sign up for exclusive Weathertex tips and trends sent straight to your inbox
Sign up for exclusive Weathertex tips and trends sent straight to your inbox
Subscribe
Sign up for exclusive Weathertex tips and trends sent straight to your inbox